
You scroll through X, land on a clip worth keeping, tap the share button, and then it hits you: there’s no download option anywhere. That gap is exactly why so many Mac users go looking for a workaround. Whether it’s a tutorial you want to rewatch offline, a funny reel to send to a friend, or a highlight you’d rather not lose when the account goes private, saving a video from X on a Mac takes a couple of extra steps that the platform doesn’t hand you directly.
The good news is that none of those steps are complicated. You don’t need to install heavy software, mess with the Terminal, or pay for a subscription. In this guide, I’ll walk through every reliable way to download Twitter (X) videos on a Mac, starting with the fastest browser-based method and moving through the built-in tools macOS already gives you. By the end, you’ll know how to grab clips in MP4, pull GIFs, save video in HD, and figure out where all those files actually land on your machine.
Why X Doesn’t Let You Download Videos Directly
Before getting into the how, it helps to understand the why. X (formerly Twitter) hosts most of its videos in a streaming format rather than as a single downloadable file. When you watch a clip, your browser is stitching together small chunks of video on the fly. There’s no neat “Save Video” button because, technically, there isn’t one complete file sitting there for you to grab.
That’s not unique to X. Instagram, TikTok, and most social platforms work the same way, partly for bandwidth reasons and partly to keep content inside their own apps. So any method you use to save an X video is really just a way of reassembling that stream into a proper MP4 file your Mac can store and play. Once you know that, the tools below make a lot more sense.
A quick note on doing this the right way: downloading a video for personal use, like keeping a clip you enjoyed or saving your own content, is generally fine. Re-uploading someone else’s work as your own or using it commercially without permission is not. Respect the original creator, and when in doubt, credit or ask.
Method 1: Use TWMate (The Fastest Way on Any Mac)
If you want the shortest path from “I found a video” to “it’s saved on my Mac,” an online downloader is hard to beat. It runs entirely in your browser, so it doesn’t matter whether you’re on a MacBook Air, a Mac mini, or an iMac, and it doesn’t care which macOS version you’re running.
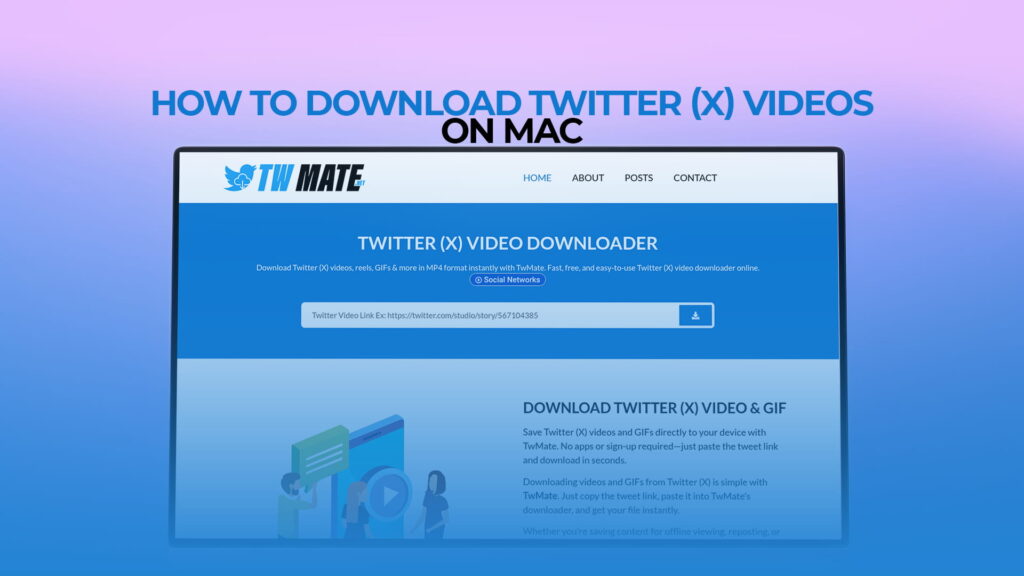
TWMate is a free tool built specifically for pulling videos, GIFs, and reels off X without an account or any software install. Here’s how it works on a Mac, start to finish.
Step 1: Copy the video link. Open X in Safari, Chrome, or whichever browser you prefer. Find the post with the video you want. Click the share icon (the little arrow) beneath the post and choose Copy link. If you don’t see a share icon, you can also click the timestamp of the post to open it on its own page, then copy the URL straight from the address bar.
Step 2: Paste the link into TWMate. Head to the TWMate homepage, click into the input box, and paste the link (Command + V). Press the download button next to it.
Step 3: Pick your quality and save. Within a second or two, you’ll see the available versions of that video, usually a few resolution options. Choose the quality you want. For most clips, the HD option gives you a crisp file without a huge size. Click download, and the MP4 lands in your Downloads folder.
That’s the whole process. No sign-up, no watermark, no email required. Because it’s browser-based, there’s nothing to update or maintain, and it works the same whether you’re grabbing one clip or twenty.
If you specifically want the highest possible resolution, TWMate also handles it. There’s a dedicated walkthrough on getting the sharpest possible file over at download X videos in 4K, which is worth a look if you’re saving something you plan to view on a big screen.
Getting HD and MP4 Files Specifically
A lot of Mac users don’t just want any copy of a video, they want a clean HD MP4 they can drop into iMovie, share over AirDrop, or store without it looking blurry. MP4 is the ideal format here because macOS plays it natively in QuickTime, and it’s compatible with basically every device and editor you’ll ever touch.
When you use TWMate, the resolution list makes this easy: pick the highest number offered and you’ll get the best version the original poster uploaded. Keep in mind that you can’t magically create quality that wasn’t there to begin with. If someone posted a low-res clip, the download will match it. But when the source is genuinely high definition, you’ll get that full quality preserved. For a deeper breakdown of saving clean, high-definition MP4 files from X, this guide on saving video from X in HD MP4 covers the details.
Method 2: Save Videos Straight From Your Browser
If you’d rather not use a separate site at all, your Mac’s browser can sometimes do the heavy lifting on its own, though this route is a bit more hands-on.
In Chrome, you can open the video post, then right-click the video itself. Occasionally you’ll get a Save video as option, but on X this is hit or miss because of the streaming format mentioned earlier. More reliably, developer-savvy users open the browser’s inspector (View menu → Developer → Developer Tools, or Command + Option + I), watch the Network tab while the video plays, and locate the media file. This works, but honestly, it’s overkill for most people and takes far longer than pasting a link into a downloader.
Safari behaves similarly. You can access the Web Inspector from the Develop menu (you’ll need to enable it first under Safari → Settings → Advanced), but again, this is a technical detour rather than a shortcut. Unless you enjoy digging through network requests, the browser-only approach is best kept as a backup when everything else is unavailable.
The takeaway: your browser can do this, but it wasn’t designed for it, so the experience is clunky. For day-to-day saving, a purpose-built tool will always be quicker.
Method 3: Record the Screen With QuickTime
Here’s a method that surprises people because it uses a tool already sitting on your Mac. QuickTime Player, the same app you use to watch videos, can record your screen. That means you can capture any X video as it plays, no download link required.
To do it:
- Open QuickTime Player from your Applications folder.
- In the menu bar, click File → New Screen Recording. On newer macOS versions, this opens the built-in screen recording toolbar (you can also summon it directly with Command + Shift + 5).
- Choose whether to record the whole screen or just a selected portion. Dragging a box around the video area keeps the file smaller and cleaner.
- Make sure the audio source is set correctly if you want sound, then hit Record.
- Play the X video, let it run to the end, then stop the recording. Your capture opens automatically, ready to trim and save as an MP4 or MOV.
Screen recording has real advantages: it works on absolutely any video, including ones that downloaders occasionally struggle with, like live streams or protected posts. The trade-off is quality and effort. You’re capturing what’s on screen rather than the original file, so the result depends on your display and can pick up interface elements if you’re not careful with the selection. It’s a solid fallback, not a first choice, but it’s genuinely handy to know your Mac can do this out of the box.
Method 4: Browser Extensions
Some Mac users like the idea of a download button living right inside their browser. There are extensions for Chrome and Safari that promise one-click X video saving. When they work, they’re convenient: you click an icon and the file downloads.
That said, approach extensions with a little caution. Video-download extensions come and go, and X frequently changes how it serves media, which breaks them without warning. Some also request broad permissions to read your browsing activity, which is more access than a simple downloader should need. If you go this route, stick to well-reviewed options from the official Chrome Web Store or Safari extensions gallery, and check that they’re actively maintained.
For most people, this is why a website-based tool ends up winning. There’s nothing to install, nothing to grant permissions to, and nothing that quietly stops working after an update. You just paste and go.
How to Download Twitter (X) GIFs on Mac
Videos aren’t the only thing worth saving. X is full of reaction GIFs, and grabbing those on a Mac follows almost the same path. The wrinkle is that X technically stores “GIFs” as short looping videos rather than true .gif files, so what you copy is a video link, not an image link.
To save one, copy the post link exactly as you would for a video, then run it through a downloader that handles GIF conversion. You’ll usually get the option to save it as either an MP4 or a proper animated GIF, depending on how you plan to use it. If you’re building a reaction folder or want the file to loop automatically in messages, the GIF format is the one to pick. The process is quick enough that you can build up a whole collection in a few minutes, and it saves straight to your Downloads folder like any other file.
Where Do Downloaded Videos Go on a Mac?
This trips people up more than you’d expect. You download a clip, then can’t find it. By default, any file you download in Safari or Chrome on a Mac goes into the Downloads folder. You can reach it fast by opening Finder and clicking Downloads in the sidebar, or by pressing Command + Option + L in the Finder.
If you’d rather your saved videos go somewhere specific, like a folder for a project or a shared drive, you can change the default download location in your browser settings. In Chrome, that’s under Settings → Downloads. In Safari, it’s under Settings → General → File download location. Setting this once means every X video you grab afterward lands exactly where you want it, no dragging files around later.
From there, double-clicking the MP4 opens it in QuickTime, and you can move it into Photos, drop it into iMovie, or AirDrop it to your iPhone in seconds.
Quick Tips for a Smoother Experience
A few small things make saving X videos on a Mac noticeably easier:
Copy the right link. Make sure you’re copying the link to the specific post with the video, not a link to someone’s profile or a search page. Opening the post on its own first, then copying from the address bar, is the most foolproof approach.
Check the resolution before you commit. If a tool offers multiple quality options, glance at them before downloading. The highest option is best for keeping, but a smaller size is friendlier if you’re texting it or short on storage.
Keep your browser updated. An out-of-date browser occasionally causes copy or paste hiccups. A quick update usually clears up any weirdness.
Save your own content freely. If you post videos to X yourself, downloading your own uploads for backup is completely reasonable, and it’s a smart habit in case an account ever gets locked or lost.
If you want to explore more tools and guides beyond video, the full TWMate blog collects walkthroughs on downloading different kinds of X media, from reels to GIFs.
Which Method Should You Actually Use?
If you’re the type who just wants the video and doesn’t want to think about it, an online downloader like TWMate is the clear winner. It’s free, needs no install, works on every Mac regardless of chip or macOS version, and handles video, GIFs, and reels from one page. Paste, pick your quality, done.
Reach for QuickTime screen recording when you hit an unusual case, like a live video or a post a downloader won’t touch. Keep the browser-inspector trick in your back pocket for emergencies. And if you love the convenience of an in-browser button and don’t mind the occasional breakage, a well-reviewed extension can work too.
Whichever route fits you, the core idea is the same: X hides the download button, but your Mac gives you several ways around it. Once you’ve done it once, saving a clip becomes a ten-second habit rather than a hunt. Copy the link, drop it into a downloader, choose your quality, and the video is yours to keep, offline, in full quality, and ready whenever you want it.